Prerequisites for Installing DirectAdmin on Your Server
Before installing DirectAdmin on your server, there are certain prerequisites that need to be met to ensure a smooth installation process. First and foremost, you need to have a VPS or dedicated server running a supported operating system such as CentOS or Debian. It is also recommended to have a fresh installation of the operating system without any unnecessary packages or configurations.
Additionally, your server should have a minimum of 1GB RAM and 10GB of free disk space. It is important to have a stable internet connection as well. Make sure your server’s hostname is properly configured and points to its IP address. Lastly, ensure that you have root access to your server as DirectAdmin requires root privileges for installation and management. By meeting these prerequisites, you will be well-prepared to install and configure DirectAdmin on your server.
Obtaining and Preparing the DirectAdmin Installation Package
To begin the process of installing DirectAdmin on your server, the first step is to obtain and prepare the DirectAdmin installation package. The installation package can be obtained from the official DirectAdmin website by downloading the appropriate version for your server’s operating system. It is crucial to ensure that you are downloading the correct package, as using an incompatible version may cause installation issues or lead to an unstable system.
Once the installation package is downloaded, the next step is to prepare it for installation. This involves verifying the integrity of the downloaded package, which can be done by comparing its checksum with the one provided on the DirectAdmin website. The checksum ensures that the downloaded package has not been tampered with during the downloading process. Additionally, it is essential to have the necessary system requirements in place before proceeding with the installation. This includes having a supported operating system, sufficient disk space, and other prerequisites specified by DirectAdmin.
Configuring Your Server for DirectAdmin Installation
Before proceeding with the installation of DirectAdmin on your server, it is crucial to configure your server properly. This step ensures that the installation process goes smoothly and that DirectAdmin functions correctly.
One essential aspect of server configuration is ensuring that the server meets the minimum system requirements for DirectAdmin. These requirements typically include a specific operating system version, sufficient disk space, and adequate memory. It is recommended to consult the official DirectAdmin documentation for the exact system requirements based on your server’s specifications. Once you have identified the required system specifications, you can proceed with the necessary steps to align your server accordingly.
Apart from system requirements, you may also need to configure network settings on your server. This includes assigning a static IP address to your server and configuring network interfaces. Having a static IP address ensures that your server can be accessed consistently without any issues. Additionally, it is advised to configure firewall settings and open necessary ports to allow incoming traffic for DirectAdmin communication. By properly configuring your server’s network settings, you provide a stable foundation for the installation and usage of DirectAdmin.
Installing and Configuring the Required Dependencies
To ensure the smooth installation and functioning of DirectAdmin on your server, it is crucial to install and configure the required dependencies. These dependencies serve as the foundation for the control panel and its various functionalities.
Before proceeding with the installation, it is essential to ensure that your server meets the necessary requirements. This includes having a compatible operating system, such as CentOS, Red Hat Enterprise Linux, or Ubuntu, along with a stable internet connection. Additionally, it is advisable to have a minimum of 1GB RAM and 10GB of free disk space available for optimal performance. Once these requirements are met, you can move forward with preparing your server for the installation process.
Downloading and Installing the DirectAdmin Control Panel
After ensuring that your server meets all the prerequisites, the next step is to download and install the DirectAdmin control panel. DirectAdmin offers an easy way to manage your server and its associated services through a user-friendly interface. To begin, obtain the latest version of DirectAdmin from their official website or through the provided download link. Once downloaded, you can proceed with the installation process.
To install DirectAdmin, start by SSHing into your server and navigating to the location where you saved the installation package. Extract the package using the command ‘tar -xzf directadmin.tar.gz.’ This will create a ‘directadmin’ directory in the same location. Now, enter the ‘directadmin’ directory by using ‘cd directadmin’ and run the installation script by executing ‘./directadmin’ command. This script will guide you through the installation process, asking for necessary details such as your license ID and IP address. Additionally, you may customize the installation by editing the ‘options.conf’ file before running the installation script. Once the installation completes, DirectAdmin will be available for use on your server, allowing you to efficiently manage your hosting environment.
Verifying the Installation and Accessing the DirectAdmin Interface
After successfully installing DirectAdmin on your server, the next step is to verify the installation and access the DirectAdmin interface. This will ensure that the installation was completed correctly and that you can now begin managing your server effectively.
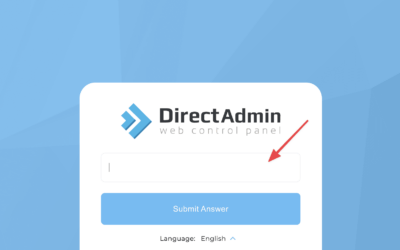
To verify the installation, open your web browser and enter the IP address or domain name of your server, followed by the port number 2222. For example, if your server’s IP address is 192.168.0.1, you would enter “http://192.168.0.1:2222” in the address bar of your browser. If the installation was successful, you should see the DirectAdmin login page.
Upon accessing the DirectAdmin interface, you will be prompted to enter the username and password that you specified during the installation process. Once you have entered the correct credentials, click on the “Login” button to access the control panel. If the login is successful, you will be presented with the DirectAdmin dashboard, where you can begin managing your server and configuring various settings to suit your needs.
Configuring Security Settings for DirectAdmin
When it comes to configuring security settings for DirectAdmin, there are several important considerations to keep in mind. One of the first steps is to ensure that you have enabled Secure Socket Layer (SSL) for your DirectAdmin control panel. SSL provides an encrypted connection between the user’s browser and the control panel, protecting sensitive data from unauthorized access. To enable SSL, you will need to obtain an SSL certificate and configure your web server accordingly.
In addition to enabling SSL, it is crucial to regularly update and patch your DirectAdmin installation. Like any software, DirectAdmin may have vulnerabilities that can be exploited by hackers. By keeping your installation up to date with the latest security patches, you can minimize the risk of security breaches. DirectAdmin provides a straightforward update mechanism to ensure that you are always running the latest version. It is recommended to regularly check for updates and apply them promptly to maintain the security of your server.
Setting up DNS and Name Servers in DirectAdmin
Once you have successfully installed DirectAdmin on your server, the next step is to set up the DNS and name servers in DirectAdmin. This is an essential task as it ensures that your website’s domain name is correctly associated with your server’s IP address.
To begin, access the DirectAdmin web interface by navigating to your server’s IP address followed by the port number 2222 (e.g., http://your_server_ip:2222). Log in using your administrator credentials. Once logged in, locate the “DNS Management” section in the DirectAdmin control panel.
In the DNS Management section, you will find various options to configure your domain’s DNS settings. Start by adding the necessary name servers. These name servers will be responsible for resolving DNS queries for your domain. You will typically have two name servers provided by your domain registrar or hosting provider. Click on the “Add new DNS” button and enter the name server information provided. Once added, click the “Save” button to ensure the changes take effect.
Now that you have set up the name servers, you can proceed to configure the actual DNS records for your domain. This includes creating records such as A records, CNAME records, MX records, etc., depending on your specific requirements. DirectAdmin provides a user-friendly interface to manage these records efficiently. Simply locate the “DNS Records” section and follow the provided instructions to create and modify the required DNS records for your domain.
Remember, accurate DNS configuration is crucial for your website’s proper functioning. Double-check your DNS settings to ensure they are correct before moving forward.
Managing User Accounts and Permissions in DirectAdmin
When it comes to managing user accounts and permissions in DirectAdmin, the process is straightforward and intuitive. DirectAdmin provides users with a powerful interface to create and manage accounts, granting different levels of access and control to ensure efficient and secure management.
To create a new user account, simply navigate to the “User Account” section in DirectAdmin and click on the “Create New User” button. Fill in the required information, such as the username, password, and email address, and specify the account type, which can be a reseller account or a regular user account. Once the account is created, you can assign various permissions to control the user’s access to different features and functionalities within DirectAdmin. This includes managing domains, email accounts, databases, FTP access, and more. With DirectAdmin’s granular permission settings, you have the flexibility to fine-tune the level of control for each user, ensuring that they have access only to the necessary resources while maintaining security and data integrity.
Overall, the user account management system in DirectAdmin provides an efficient and user-friendly way to handle account creation and control. Whether you have a small number of users or a large-scale hosting environment, DirectAdmin’s intuitive interface makes it easy to manage user accounts and permissions effectively.
Troubleshooting Common Issues during DirectAdmin Installation and Usage
When installing and using DirectAdmin, users may encounter various common issues that can disrupt the installation or affect the functionality of the control panel. One common issue is the mismatch of system requirements. DirectAdmin has specific prerequisites, such as operating system compatibility, minimum hardware specifications, and required software packages. Failure to meet these prerequisites can result in installation failures or performance issues. To troubleshoot this issue, it is essential to carefully review the system requirements provided by DirectAdmin and ensure that your server meets all the necessary criteria.
Another common issue users may face is connectivity problems during the installation process. This can occur due to a variety of reasons, such as network configuration issues or firewall restrictions. To troubleshoot connectivity problems, it is recommended to check the network settings of your server and ensure that it has proper internet access. Additionally, reviewing firewall settings and ensuring that necessary ports are open for DirectAdmin can help resolve any connectivity issues. If the problem persists, reaching out to the DirectAdmin support team or referring to the official documentation can provide further assistance in resolving these issues.
• Mismatch of system requirements:
– DirectAdmin has specific prerequisites, such as operating system compatibility, minimum hardware specifications, and required software packages.
– Failure to meet these prerequisites can result in installation failures or performance issues.
– To troubleshoot this issue, carefully review the system requirements provided by DirectAdmin and ensure that your server meets all the necessary criteria.
• Connectivity problems during installation:
– This can occur due to network configuration issues or firewall restrictions.
– Troubleshoot by checking the network settings of your server and ensuring proper internet access.
– Review firewall settings and ensure necessary ports are open for DirectAdmin.
• Reaching out for assistance:
– If connectivity problems persist, contact the DirectAdmin support team for further assistance.
– Referring to the official documentation can also provide helpful guidance in resolving common installation issues.
What are the prerequisites for installing DirectAdmin on my server?
The prerequisites for installing DirectAdmin on your server include a clean and minimal CentOS or Red Hat Enterprise Linux installation, a static IP address, and a fully qualified domain name.
How can I obtain and prepare the DirectAdmin installation package?
You can obtain the DirectAdmin installation package by purchasing a license from the official DirectAdmin website. Once you have the license, you can download the installation files and prepare them by ensuring the correct permissions are set.
What steps are involved in configuring my server for DirectAdmin installation?
Configuring your server for DirectAdmin installation involves updating your server, setting up a hostname, configuring the network, disabling SELinux, disabling FirewallD or iptables, and ensuring the correct system requirements are met.
How do I install and configure the required dependencies for DirectAdmin?
You can install and configure the required dependencies for DirectAdmin by using the installation script provided by DirectAdmin. This script will automatically download and install the necessary packages.
How do I download and install the DirectAdmin Control Panel?
To download and install the DirectAdmin Control Panel, you need to run the installation script provided by DirectAdmin. This script will guide you through the installation process and configure the necessary settings.
How can I verify the installation and access the DirectAdmin interface?
You can verify the installation of DirectAdmin by checking the status of the DirectAdmin service. Once the installation is successful, you can access the DirectAdmin interface by using the URL provided during the installation.
What security settings should I configure for DirectAdmin?
You should configure security settings for DirectAdmin by enabling SSL/TLS encryption, setting up a firewall, and implementing strong passwords for all user accounts.
How do I set up DNS and name servers in DirectAdmin?
To set up DNS and name servers in DirectAdmin, you need to configure the DNS settings in the DirectAdmin interface. This involves adding DNS records and setting up the name servers for your domain.
How can I manage user accounts and permissions in DirectAdmin?
You can manage user accounts and permissions in DirectAdmin by using the user management features in the DirectAdmin interface. This allows you to create, modify, and delete user accounts, as well as assign different permissions to each user.
What are some common issues that may arise during DirectAdmin installation and usage?
Some common issues during DirectAdmin installation and usage may include incorrect permissions, firewall blocking access, database connection errors, SSL certificate issues, and compatibility issues with certain operating systems or configurations.


