
Important Terminology
SSL certificate installation involves several key terms that are important to understand in order to successfully navigate the process. Let’s take a closer look at two crucial concepts: secure sockets layer (SSL) and certificate authority (CA).
Secure sockets layer, commonly known as SSL, is a protocol that establishes a secure connection between a website and the user’s browser. It encrypts the data exchanged between the two, ensuring that it remains private and secure. SSL helps to build trust between the website and its visitors, as it verifies the authenticity of the server and protects sensitive information such as credit card details, login credentials, and personal data.
A certificate authority, often abbreviated as CA, is an entity responsible for verifying the authenticity and integrity of SSL certificates. These trusted third-party organizations issue digital certificates to website owners after conducting thorough authentication procedures. A digital certificate acts as proof that the website is legitimate and can be trusted. When installing an SSL certificate, it is crucial to choose a reputable certificate authority to ensure maximum security and credibility for your website.
Prerequisites for SSL Certificate Installation
Before installing an SSL certificate, there are a few prerequisites that need to be in place. First and foremost, you will need to have a dedicated IP address for the domain where you want to install the certificate. This is because SSL certificates are tied to specific IP addresses, ensuring secure communication between the server and clients. If your website is hosted on a shared IP address, you will need to obtain a dedicated IP from your hosting provider.
Secondly, it is essential to have administrative access to the server or hosting account where the SSL certificate installation will take place. This access allows you to configure the necessary settings and complete the installation process successfully. Depending on your hosting setup, this may involve accessing the server directly or using a control panel provided by your hosting company. Make sure you have the necessary login credentials and permissions to carry out the required tasks.
Ensuring these prerequisites are met upfront will help streamline the SSL certificate installation process, eliminating any potential roadblocks and ensuring a smooth transition to a secure and encrypted website. Remember to consult with your hosting provider or system administrator if you are unsure about any of the prerequisites or need assistance with the installation process.
Generating a Certificate Signing Request (CSR)
To obtain and install an SSL certificate, the first step is to generate a Certificate Signing Request (CSR). A CSR contains information about the organization or individual requesting the certificate and is used to create a unique public/private key pair. The private key remains securely stored on the server, while the public key is embedded in the CSR. This ensures that the certificate can only be decrypted by the corresponding private key, providing a secure encryption mechanism.
When generating a CSR, you will need to provide various details such as the Common Name (CN), Organization (O), Country (C), and State/Province (ST). It is crucial to ensure that the information provided is accurate and verifiable as the CSR acts as proof of the legitimacy of your website or organization. The process of generating a CSR will vary depending on the web server platform or hosting control panel you are using. However, most platforms offer built-in tools or plugins that simplify the CSR generation process, allowing you to quickly obtain the required information and generate a valid CSR.
Purchasing an SSL Certificate
When it comes to purchasing an SSL certificate, there are a few important factors to consider. First and foremost, it’s crucial to choose a reputable certificate authority (CA) that is recognized and trusted by major web browsers. This ensures that your SSL certificate will be validated and accepted by all users visiting your website. Additionally, it’s important to determine the type of SSL certificate that best suits your needs. There are several options available, including single-domain certificates, multi-domain certificates, and wildcard certificates, each catering to different requirements. Taking the time to carefully evaluate your website’s security needs and selecting the appropriate SSL certificate will help establish trust with your visitors and protect sensitive data.
Once you have identified the right CA and SSL certificate type, it’s time to make the purchase. Most CAs offer different pricing plans and subscription options, allowing you to choose the one that fits your budget and desired level of security. During the purchase process, you will typically be required to provide information such as the domain name for which the SSL certificate is intended, along with your contact details. It’s important to double-check these details to avoid any potential issues during the installation process. After completing the purchase, you will receive the necessary SSL certificate files, typically via email or through your account with the CA. With the SSL certificate in hand, you can proceed to the next steps of installation and verification to ensure a secure and seamless browsing experience for your users.
Downloading the SSL Certificate Files
Once you have purchased an SSL certificate, the next step is to download the certificate files. The files you will need to download typically include the SSL certificate itself, along with any intermediate certificates or certificate chain files.
To download the SSL certificate files, you will usually need to access your certificate provider’s website or customer portal. Look for the section or option that allows you to manage your SSL certificates. From there, you should be able to locate and download the necessary files. It is important to make sure that you download the correct certificate files for the specific domain or subdomain you want to secure with SSL. Once you have downloaded the files, you can proceed to the next step of the installation process.
Installing the SSL Certificate in DirectAdmin
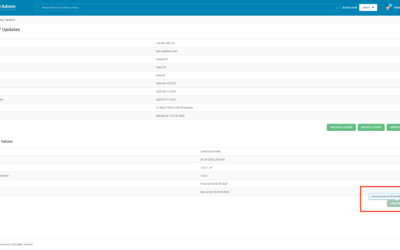
To install the SSL certificate in DirectAdmin, you need to access the control panel of your hosting account. Once you have logged in, navigate to the “SSL Certificates” section. Here, you will find an option to install a new certificate. Click on it to proceed.
You will be prompted to enter the certificate details, including the private key, certificate, and CA bundle. These files are provided to you by the SSL certificate vendor. Paste each file into the respective fields, making sure there are no additional spaces or characters. Once all the files have been uploaded, click on the “Save” button to complete the installation process. You should see a confirmation message indicating that the SSL certificate has been successfully installed on your website.
Installing an SSL certificate in DirectAdmin is a straightforward process that ensures the security and trust of your website. By following these simple steps, you can protect your visitors’ data and establish credibility for your online presence.
Assigning the SSL Certificate to a Domain
Once the SSL certificate files have been downloaded and installed in DirectAdmin, the next step is to assign the SSL certificate to a specific domain. This process ensures that when visitors access the website using HTTPS, the SSL certificate is presented and the connection is secure.
To assign the SSL certificate to a domain, navigate to the SSL Certificates section in DirectAdmin. Here, you will see a list of all the installed SSL certificates. Locate the domain you want to assign the certificate to and click on the “Assign” button next to it. A confirmation message will appear, verifying that the SSL certificate has been successfully assigned to the chosen domain. It is recommended to double-check the assigned domain to ensure that it matches the intended website.
• Once the SSL certificate files have been downloaded and installed in DirectAdmin, the next step is to assign the SSL certificate to a specific domain.
• This process ensures that when visitors access the website using HTTPS, the SSL certificate is presented and the connection is secure.
• To assign the SSL certificate to a domain, navigate to the SSL Certificates section in DirectAdmin.
• In this section, you will see a list of all the installed SSL certificates.
• Locate the domain you want to assign the certificate to and click on the “Assign” button next to it.
• A confirmation message will appear, verifying that the SSL certificate has been successfully assigned to your chosen domain.
• It is important to double-check that you have assigned it correctly and it matches your intended website.
Verifying SSL Certificate Installation
To ensure that your SSL certificate is installed correctly and functioning as intended, it is crucial to verify its installation. Verification confirms that the certificate has been successfully installed on the server and is being recognized by web browsers. One way to verify the installation is by checking the certificate details in the browser’s address bar. When you visit your website with SSL enabled, the address bar should display a padlock icon, indicating that the connection is secure. Additionally, clicking on the padlock icon should reveal the certificate details, such as the validity period and the certification authority that issued the certificate.
Another method to verify SSL certificate installation is by using online SSL checker tools. These tools analyze the SSL configuration for your website and provide detailed reports on its status. They check for common installation issues, such as mismatched domain names, untrusted certification authorities, or certificate chain errors. By using an SSL checker tool, you can ensure that your certificate is installed correctly and that your website is effectively protected by encryption.
Testing SSL Certificate Functionality
After successfully installing an SSL certificate, it is crucial to test its functionality to ensure it is working as intended. By conducting thorough testing, website owners can detect any potential issues or misconfigurations that may compromise the security of their website.
One of the primary tests to perform is verifying that the SSL certificate is valid and trusted by web browsers. This can be done by visiting the website using different browsers such as Chrome, Firefox, and Safari. When accessing the website, the browser should display a padlock symbol in the address bar, indicating that the SSL certificate is present and valid. Additionally, clicking on the padlock should display details about the certificate, such as the organization’s name and the certificate’s expiration date. It is essential to check that the details match the information provided during the SSL certificate installation process.
Troubleshooting Common SSL Certificate Installation Issues
If you encounter issues during the installation of an SSL certificate, it is important to troubleshoot them promptly to ensure secure and seamless communication on your website. One common issue that may arise is an “Invalid Certificate” error message. This can occur if the certificate has expired, has not been correctly installed, or if it is not trusted by the browser. To resolve this issue, double-check the certificate’s validity and installation process, ensuring that all steps have been followed accurately. Additionally, verify that the certificate is issued by a recognized and trusted Certificate Authority (CA) to eliminate any trust-related issues.
Another common issue is the occurrence of a “Mixed Content” warning, which indicates that some elements on your page, such as images or scripts, are still being loaded over an insecure HTTP connection instead of a secure HTTPS connection. This can compromise the security of your website and result in a loss of trust from visitors. To fix this issue, make sure that all content is loaded securely by updating the URLs of any insecure resources to HTTPS. This includes updating internal links, as well as ensuring that any external content, such as advertisements or social media widgets, are also loaded securely. By addressing these common troubleshooting issues, you can successfully overcome obstacles that may arise during the installation of your SSL certificate and maintain a secure online environment for your website.
What is SSL certificate installation?
SSL certificate installation refers to the process of configuring and setting up a Secure Sockets Layer (SSL) certificate on a server or website to enable secure communication between the server and the client.
What are the prerequisites for SSL certificate installation?
Some prerequisites for SSL certificate installation include having a valid domain name, a dedicated IP address, and administrative access to the server or hosting control panel.
How do I generate a Certificate Signing Request (CSR)?
To generate a CSR, you can usually use the SSL certificate management tools provided by your server or hosting control panel. These tools will guide you through the process of creating a private key and generating the CSR.
Where can I purchase an SSL certificate?
SSL certificates can be purchased from various trusted certificate authorities (CAs) or through SSL resellers. Some popular CAs include Comodo, Symantec, and Let’s Encrypt.
How do I download the SSL certificate files?
Once you have purchased an SSL certificate, the certificate files can usually be downloaded from the CA’s website or through the SSL certificate management tools provided by your server or hosting control panel.
How do I install the SSL certificate in DirectAdmin?
The installation process may vary depending on the server or control panel you are using. However, in DirectAdmin, you can typically navigate to the SSL section and follow the steps to upload or paste the SSL certificate files.
How do I assign the SSL certificate to a domain?
In DirectAdmin, you can assign the SSL certificate to a domain by accessing the Domain Setup section and selecting the appropriate certificate from the available options.
How can I verify the SSL certificate installation?
You can verify the SSL certificate installation by accessing your website using the HTTPS protocol and checking for the presence of the padlock icon in the browser’s address bar. Additionally, you can use online SSL checker tools to validate the certificate installation.
How do I test SSL certificate functionality?
To test SSL certificate functionality, you can perform various tests such as checking if all website pages load securely over HTTPS, ensuring proper redirection from HTTP to HTTPS, and verifying that the SSL certificate is valid and not expired.
What are some common SSL certificate installation issues?
Common SSL certificate installation issues include incorrect certificate installation, mismatched private key and certificate, certificate chaining issues, mixed content warnings, and browser compatibility problems.