
Domain Names and Web Hosting
Domain names and web hosting are essential components of your online presence. A domain name serves as the address for your website, giving it a unique identity on the internet. It allows users to easily find and access your website by typing in the domain name in their web browser. Choosing the right domain name is crucial as it represents your brand and can contribute to your website’s credibility.
Web hosting, on the other hand, refers to the service that allows your website to be accessible on the internet. It involves storing your website’s files and data on a server, which is connected to the internet. When someone visits your website, their web browser connects to the server where your website’s files are located, allowing them to view your webpages. Web hosting providers offer different options to suit various website requirements, such as shared hosting, VPS hosting, and dedicated hosting. Understanding the concepts of domain names and web hosting is essential for establishing a successful online presence.
Understanding the Domain Name System
The Domain Name System, or DNS, is a fundamental component of the internet that allows users to access websites by using easy-to-remember domain names instead of numerical IP addresses. Think of it as a phone book for the internet – when you type a domain name into your web browser, the DNS translates that name into the corresponding IP address of the server hosting the website. This translation process happens seamlessly behind the scenes, enabling users to navigate the internet effortlessly.
DNS operates through a distributed network of servers and databases, which work together to ensure accurate and reliable domain name resolution. When you enter a domain name into your browser, your request is first sent to the local DNS server provided by your internet service provider (ISP). If the local DNS server does not have the requested IP address in its cache, it will then contact other DNS servers within the network to find the correct IP address. This hierarchical structure allows for efficient querying and quick resolution of domain names, making the internet more accessible and user-friendly.
Overview of DNS Zones
A DNS zone is a portion of the DNS namespace that is managed by a particular entity, such as an organization or a web hosting provider. It is a logical container that holds all the information related to a specific domain or set of domains. In simple terms, a DNS zone is like a folder that organizes and stores the DNS records for a particular domain or group of domains.
Each DNS zone is identified by a unique name, which is usually the same as the domain name it represents. For example, if a website is hosted at the domain “example.com,” the corresponding DNS zone would also be named “example.com.” Within a DNS zone, various types of DNS records can be defined, such as A records, MX records, CNAME records, and TXT records. These records provide essential information about how to connect to and communicate with the domain, such as the IP address to which it points or the mail server responsible for handling email for the domain.
By organizing DNS records into separate zones, administrators can easily manage and update the DNS information for different domains. This hierarchical structure allows for better control and flexibility when it comes to managing the DNS settings for individual websites or services. Additionally, DNS zones enable efficient delegation of DNS management, as different entities can be assigned responsibility for managing their own zones while still utilizing the same underlying DNS infrastructure.
Types of DNS Records
There are several types of DNS records that serve different purposes within the Domain Name System. One commonly used type is the A record, which maps a domain name to the IP address of the server hosting the corresponding website. This record allows users to access the website by typing the domain name into their browsers.
Another important type of DNS record is the MX record, which is used for configuring email services. The MX record specifies the mail server responsible for accepting incoming emails for a domain. By setting up the correct MX record, emails can be delivered to the appropriate mail server, ensuring smooth communication via email.
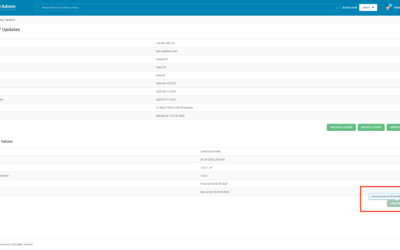
Creating a DNS Zone in DirectAdmin
To create a DNS zone in DirectAdmin, you will need to access your DirectAdmin control panel and follow a few simple steps. Firstly, locate and click on the “DNS Management” option in the control panel. This will take you to the DNS Zone Editor, where you can manage your domain’s DNS settings.
Once you are in the DNS Zone Editor, you will see a list of your existing DNS zones, if any. To create a new DNS zone, click on the “Add Zone” button. You will be prompted to enter the domain name for which you want to create a new DNS zone. Simply type in the domain name, such as example.com, and click on “Create.” DirectAdmin will then create a new DNS zone for the specified domain, and you will be able to manage its DNS records. Creating a DNS zone in DirectAdmin is a straightforward process that allows you to have full control over your domain’s DNS settings.
Managing DNS Records in DirectAdmin
To efficiently manage DNS records in DirectAdmin, users can take advantage of the intuitive interface provided by the platform. With DirectAdmin, administrators have the capability to easily add, modify, and delete DNS records for their domains. This flexibility allows for seamless customization of DNS settings to align with the specific requirements of individual websites.
When it comes to adding DNS records in DirectAdmin, the process is straightforward. Users can start by accessing the DNS administration page within the DirectAdmin control panel. From there, they can select the domain for which they wish to add a DNS record. Next, they can choose the type of record they want to create, such as A, MX, CNAME, or TXT. The subsequent steps involve providing the relevant information, such as IP addresses for A records, mail server details for MX records, and target domains for CNAME records. Once all the required fields are filled, users can save the changes, and the new DNS record will be instantly active for the designated domain.
• To efficiently manage DNS records in DirectAdmin, users can take advantage of the intuitive interface provided by the platform.
• With DirectAdmin, administrators have the capability to easily add, modify, and delete DNS records for their domains.
• This flexibility allows for seamless customization of DNS settings to align with the specific requirements of individual websites.
When it comes to adding DNS records in DirectAdmin:
• Users can start by accessing the DNS administration page within the DirectAdmin control panel.
• From there, they can select the domain for which they wish to add a DNS record.
• Next, they can choose the type of record they want to create, such as A, MX, CNAME or TXT.
• The subsequent steps involve providing relevant information like IP addresses for A records,
mail server details for MX records and target domains for CNAME records.
• Once all required fields are filled, users can save changes and
the new DNS record will be instantly active for the designated domain.
Setting up A Records for Domain Names
Setting up A Records for Domain Names is an essential step in managing the Domain Name System (DNS). A Records, also known as Address Records, link domain names to their corresponding IP addresses. By setting up A Records correctly, you ensure that visitors can access your website by simply typing the domain name into their browsers.
To set up A Records for your domain name, you will usually need to access the control panel of your web hosting provider or domain registrar. Once there, you can navigate to the DNS management section and locate the A Record settings. Here, you can add or edit the A Records by specifying the domain name and the corresponding IP address. It is important to note that any changes to the A Records may take some time to propagate throughout the internet, so it is advisable to double-check and verify the changes before expecting them to be fully functional. By correctly configuring A Records for your domain names, you ensure a smooth and seamless experience for your website visitors.
Configuring MX Records for Email
To ensure proper functioning of email services, it is crucial to configure MX (Mail Exchange) records for your domain. MX records specify the mail server responsible for receiving email messages intended for your domain. By correctly setting up MX records, you can ensure a smooth email experience for your users.
To configure MX records, you will need to access your domain’s DNS settings. Typically, this can be done through your web hosting control panel or domain registrar. Once you have access, locate the DNS management section and look for the option to add or edit MX records. Here, you will need to enter the priority and destination for each MX record. The priority determines the order in which mail servers are contacted, with a lower number indicating higher priority. The destination specifies the hostname of the mail server. By correctly adding and prioritizing MX records, you can ensure that email messages sent to your domain are delivered to the correct mail server for processing.
Adding CNAME Records for Website Subdomains
When setting up a website, you may want to create subdomains to organize your content or to provide different sections for your users. Adding CNAME (Canonical Name) records for website subdomains allows you to do just that.
A CNAME record is used to alias one domain name to another and can be beneficial when you want to point a subdomain to a different server or service. To add a CNAME record for a website subdomain, you’ll need to access your domain’s DNS management panel, which can usually be found through your web hosting provider’s control panel. Once you have accessed the DNS management panel, locate the option to add a CNAME record and provide the necessary information, including the subdomain name and the destination domain name or IP address. Save the changes, and the CNAME record will be added to your DNS configuration.
Remember that it may take some time for the changes to propagate, so don’t be alarmed if your subdomain doesn’t immediately start working. Additionally, ensure that your web hosting provider supports the use of CNAME records for subdomains, as some providers may have limitations or alternative methods for setting up subdomains. By adding CNAME records for your website subdomains, you can effectively manage and direct traffic to different sections of your website.
Managing TXT Records for SPF and DKIM
TXT records are an essential component of managing SPF (Sender Policy Framework) and DKIM (DomainKeys Identified Mail) for your domain. SPF and DKIM are authentication methods used to verify the authenticity of emails sent from your domain. By configuring TXT records, you can improve email deliverability and protect your domain from email spoofing or phishing attacks.
To set up SPF, you need to create a TXT record in your domain’s DNS settings that specifies the authorized mail servers for sending emails on behalf of your domain. This record helps email receivers verify that the emails they receive from your domain are legitimate and not forged. By publishing your SPF record, you can prevent spammers from using your domain to send unauthorized emails, thereby safeguarding your domain’s reputation.
For DKIM, you also need to create a TXT record in your DNS settings. The DKIM record contains a digital signature that is added to outgoing emails from your domain. When the receiving mail server receives the email, it can verify the DKIM signature against the public key stored in the DKIM DNS record. If the signature is valid, it confirms that the email has not been modified during transit and that it does indeed originate from your authorized domain. By enabling DKIM, you can enhance email deliverability and improve the credibility of your domain’s emails.
What is SPF and DKIM?
SPF (Sender Policy Framework) and DKIM (DomainKeys Identified Mail) are email authentication methods used to verify the authenticity of the sender and protect against email spoofing and phishing attacks.
Why is it important to manage TXT records for SPF and DKIM?
Managing TXT records for SPF and DKIM ensures that your email messages are properly authenticated and delivered, reducing the chances of your emails being marked as spam or being rejected by recipient servers.
How does SPF work?
SPF relies on DNS TXT records to specify the authorized mail servers that are allowed to send emails on behalf of a domain. Recipient servers can check these records to verify the authenticity of the sender.
What should be included in an SPF TXT record?
An SPF TXT record should include a list of IP addresses or hostnames of the mail servers authorized to send emails for a specific domain. This helps prevent unauthorized senders from spoofing your domain.
How does DKIM work?
DKIM uses public-key cryptography to digitally sign outgoing emails. The sender’s domain generates a pair of cryptographic keys – a private key for signing and a public key for verification. The public key is published in a DNS TXT record.
What is the purpose of a DKIM TXT record?
The DKIM TXT record holds the public key used for verifying the digital signature of DKIM-signed emails. It allows recipient servers to ensure that the email originated from the legitimate sender and hasn’t been modified during transit.
How do I add SPF and DKIM TXT records?
To add SPF and DKIM TXT records, you need to access your domain’s DNS management interface (e.g., DirectAdmin) and create new TXT records with the appropriate values provided by your email service provider.
Can I have multiple SPF or DKIM TXT records for a domain?
It is recommended to have only one SPF TXT record per domain. However, you can have multiple DKIM TXT records if you have multiple DKIM keys corresponding to different email services or subdomains.
How long does it take for changes to DNS records to take effect?
DNS records can take up to 24-48 hours to propagate across the internet. However, in most cases, changes are visible within a few hours.
What happens if I don’t set up SPF or DKIM records?
Without SPF or DKIM records, your emails may be more likely to be flagged as spam or rejected by recipient servers, potentially impacting the deliverability of your emails. It also leaves your domain vulnerable to spoofing and phishing attacks.